How to Build This Tiny Cabin That Will Pay for Itself

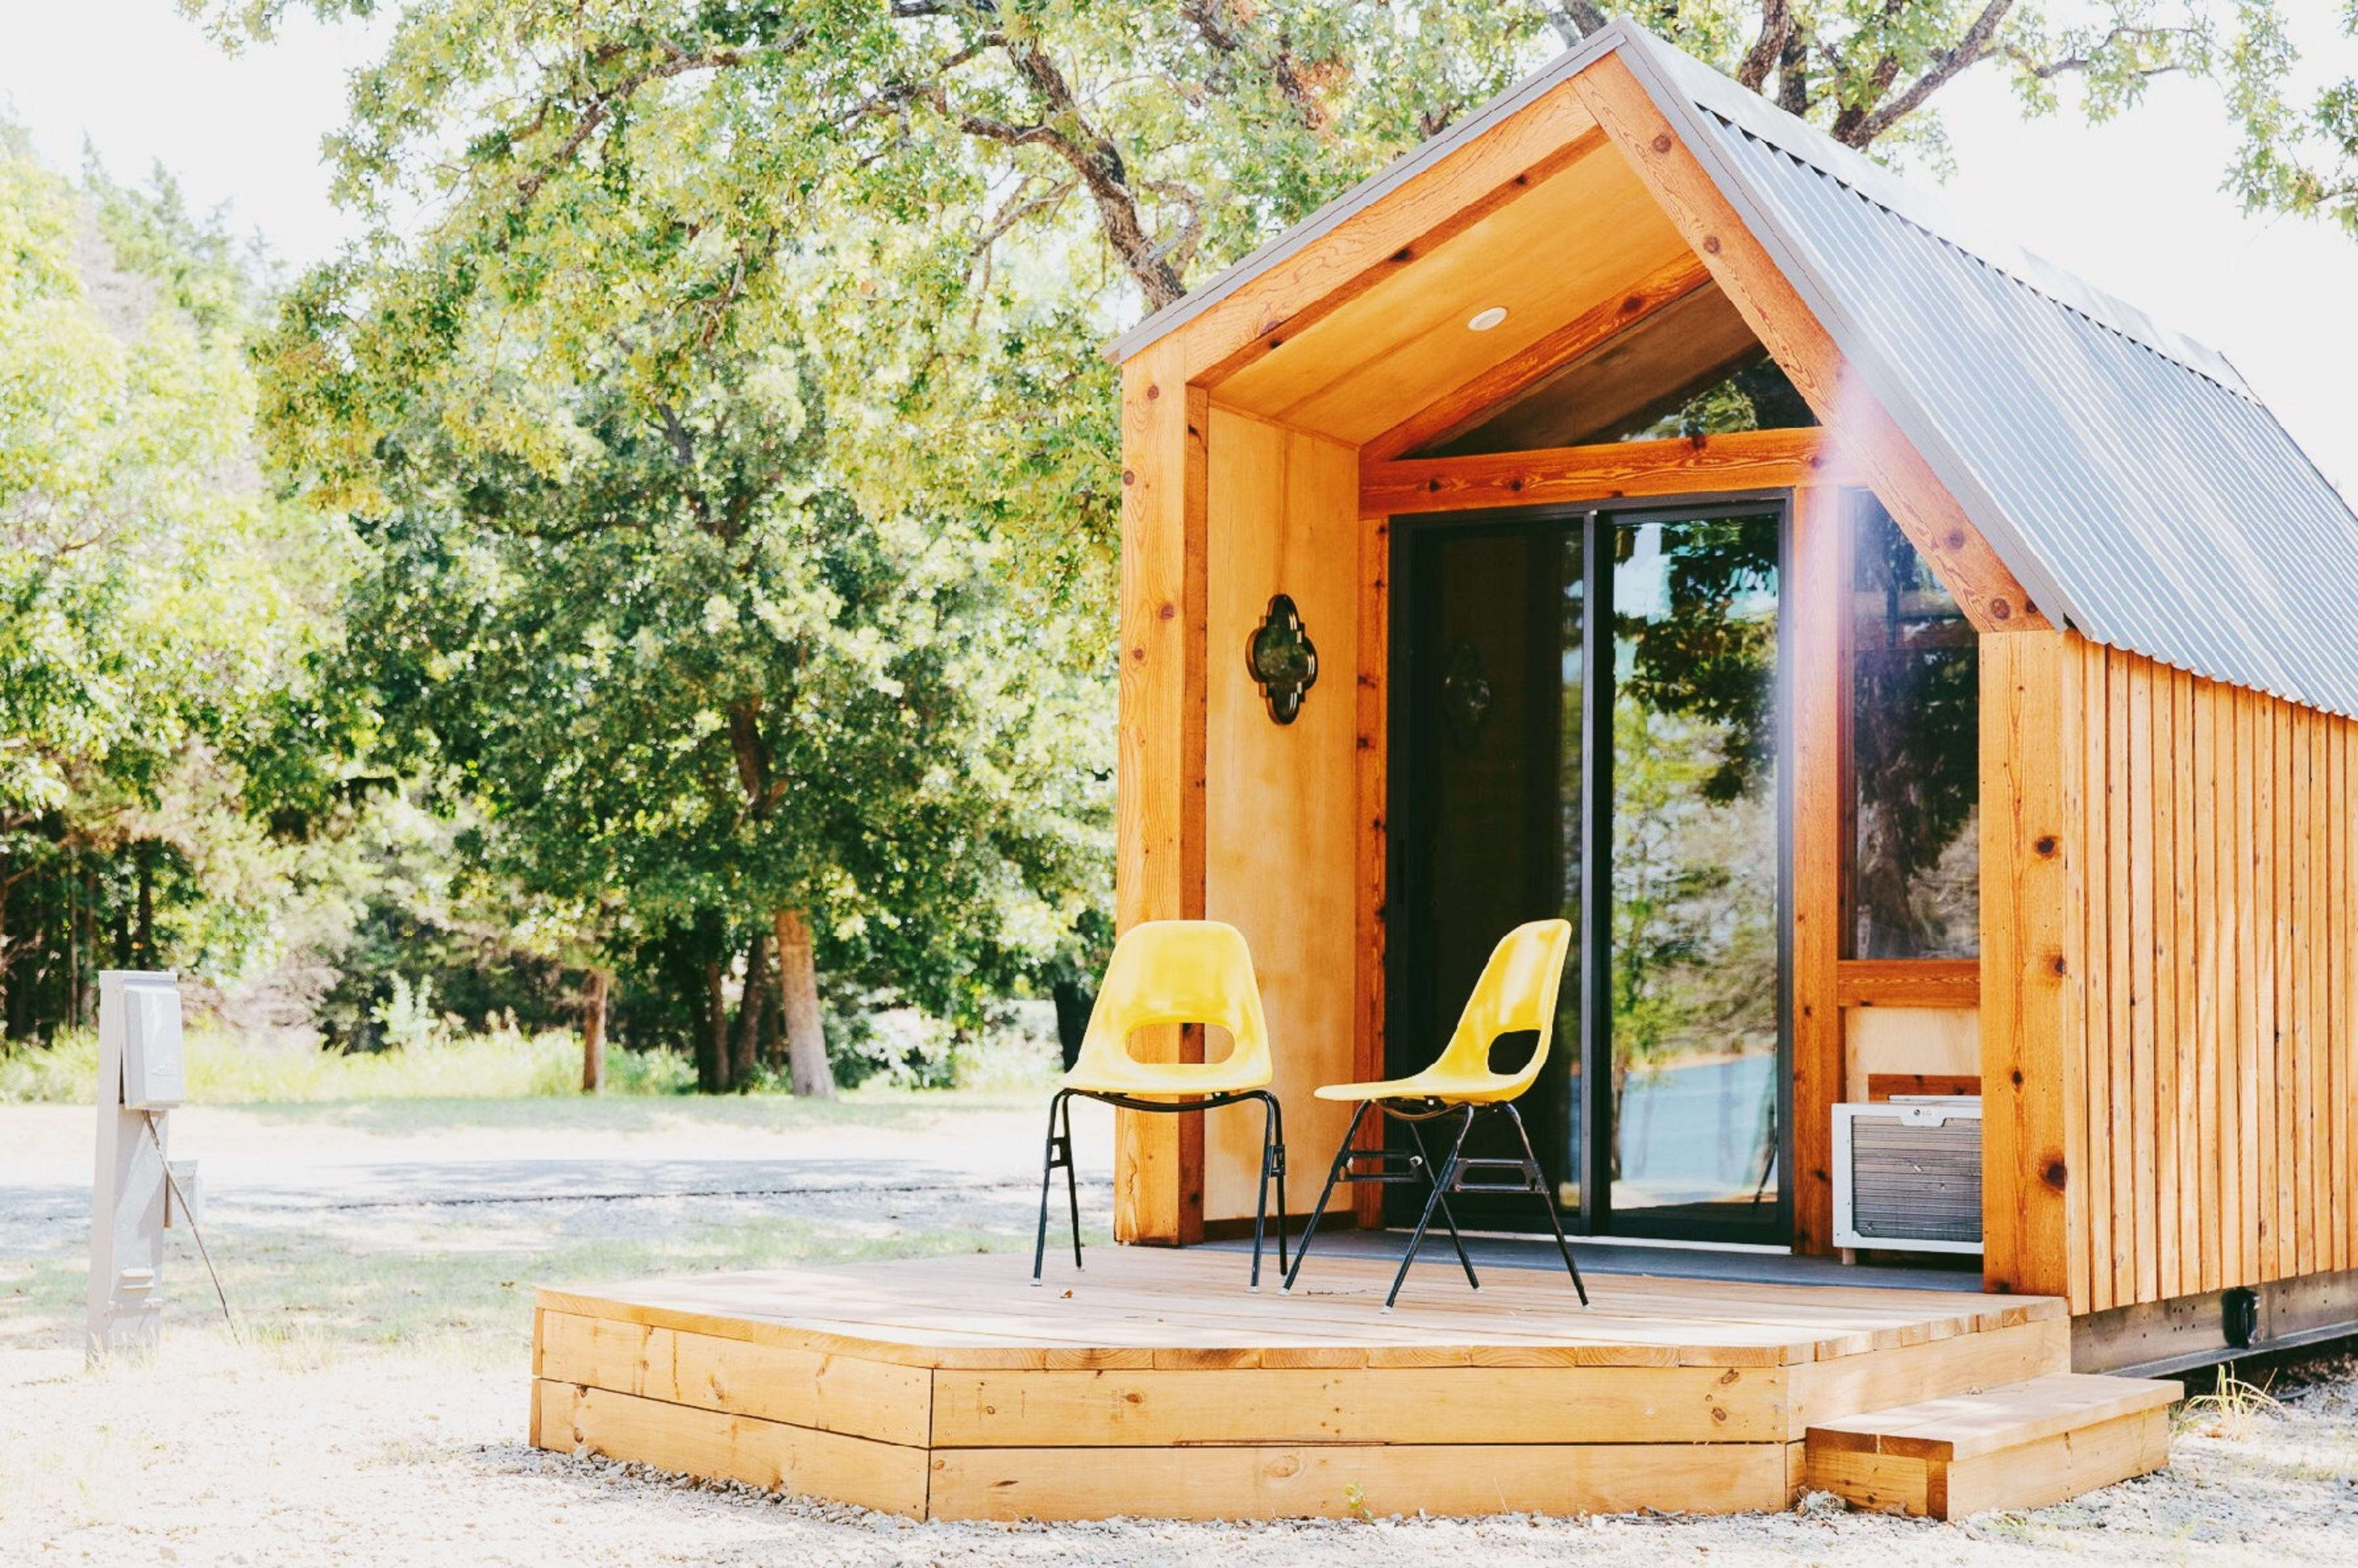
Photo by Michael T. at Kasita Glamping Cabins Lake Texoma
This post was written by Hipcamp Host Michael Tucker. He designed the Kasita cabin and has several of them available for booking on his profitable listing, Kasita Glamping Cabins Lake Texoma. Adorable tiny cabins and tiny houses are among Hipcamp’s most-booked and most profitable types of structures on our platform. Check out the tiny cabins and houses that our Hipcampers count as faves.
Long before tiny homes were a thing and before glamping was cool, living small fascinated me. I tent-camped in Joshua Tree for the better part of a year. I lived in a 24-foot camper for a while. And then I settled down in New York City. So, in 2010, when I got involved with my family’s vacation rentals on Lake Texoma, Texas, it was only a matter of time before my love of living small permeated the business.
In the years that followed, we acquired a variety of unique properties around the lake: a 35-cabin marina, a resort, and even an Army Corps of Engineers campground. The existing structures on each of the properties were fairly dated and not working for the demographic we wanted to attract, so we decided to revive them with something cozier and more modern.
Shipping containers were cost-prohibitive, considering we had dozens of mobile cabins to replace and RV sites to fill, and yurts and canvas tents didn’t offer the sleek look we were after. We also had the added complexity of being on a floodplain — the structures had to be portable when waters rose, which also meant we couldn’t have plumbing.
We were left with this question: what’s cost-effective, portable, easy-to-build, and aesthetically-compelling to guests? Enter the Kasita.
Once I finalized the concepts, I got to work with our construction team—it only took 20 days to build each structure, so we built two. They were huge success right away, so we built four more. We now have six Kasitas at our Hipcamp listing, Kasita Glamping Cabins Lake Texoma, and plan on building four more soon.
If you’re interested in earning extra money hosting campers and glampers on your land, you should start a listing with Hipcamp.
I’ve outlined the design benefits, construction techniques, and 11 DIY steps below so you can build your own Kasita. But first, a few photos of the finished product:


Benefits of the Kasita’s tiny modern house design
- Cost-Effective: A structure that can be built cost-effectively with locally sourced materials. Also something that could be replicated easily as demand grows.
- Portable: Small enough that they can be moved with our tilt-trailer yet strong enough to withstand the stresses of moving. The dimensions were established based on what can legally be hauled down the road without a permit.
- Perfect for RV sites: Due to small size and power draw being less than 30 amps.
- Weather-proof: Strong framing that allows for thicker insulation. We used wool, which is more weather resistant than the pink stuff.
- Environmentally-friendly: Both in construction and through it’s minimal impact on surrounding nature.
- Functional: A usable space that is better than a tent but without too many creature comforts that cause you to forget to enjoy nature.
- Beautiful: Subjective, but a design that can stand the test of time and have a modern feel without overpowering the nature that surrounds it.
In total, the materials to build one Kasita cost around $7,000, including the skid-frame (what makes it portable.) Here’s the conceptual design and some measurements:

And, without further ado, the 11 steps for building your own tiny modern cabin:

1. Skid frame
From an engineering perspective, we elected to use an 8” steel I-Beam frame that would be rigid enough to withstand flexing when we moved them. It’s heavy, but worth the added strength. We fitted the frames with 2 C-Channel steel cross supports to provide extra rigidity and welded on loops to be able to move them as needed. Cross beams were 2×6 I purchased a ‘tilt-trailer’ that I can literally back up to the Kasita, hook up a winch and load them on a trailer in about 30 minutes. The frames are 8’ x 16’ which accommodate for zero-waste construction.
2. Decking
This is simple. It’s 4 sheets of ¾” marine-grade plywood that would be painted for durability and maintenance.

3. Framing
All walls were constructed with 2×6 pine on 16” centers to allow for structural support and thicker insulation. Even though they have HVAC units and a small space, efficiency and comfort were very important. Texas summers are warm and winters are cold—we wanted the Kasitas to be usable and comfortable year-round.
4. Walls
Walls were covered with standard sheathing before we installed the cedar siding. We used a Tyvek moisture barrier.

5. Roofing
A gray metal U-Panel roof was used. Metal roofs are quick to install, durable, and have a beautiful look, especially when contrasted with the bright cedar siding.
6. Interior construction
Insulation was done with Roxul brand wool insulation (aka Rockwool.) We chose this for the high R-value and sound dampening, plus it’s much more environmentally-friendly and weather-resistant than the pink stuff. The interior is ¼” birch plywood stained in a natural color to bring out the wood’s natural beauty. This provided a very clean line that carries your sights beyond the interior to flow into outside. The loft was built with a 2×4 lower frame and covered with plywood, designed to fit a full size bed.
7. Door and windows
The sliding door and rear window were custom-ordered from the orange big box store. We chose a sliding door so the door could be left open and screened (like a patio door) to enjoy the fresh breeze off the lake. We wanted the largest wall of glass possible to make the outside and inside blend together. The rear window is a crank-to-open window to help the fresh air flow through. The two angled windows were ordered from a local glass shop. We then tinted the windows with reflective tint for added privacy and to reflect solar heating away from the interior.
8. Electrical
Although the electrical is relatively simple, there were a few key components that we wanted to incorporate. First off, all the lighting needed to be warm led light (3300 Kelvin) and dimmable. The porch light needed to be switched separately from the interior and we wanted soffit lighting under the bunks. Each sleeping area has a standard wall plug with USB power right next to the bed and a GFCI outlet installed outside. We installed small ‘through-the-wall’ AC Units with heat for year-round comfort. All in all, power draw is less than 30 amps (AC being most of that) so they can be used in most RV sites.
9. Front deck
The front deck was added on after the Kasitas were placed in their location. The design was chosen to emulate the Golden Hour shadow that would be cast onto the Kasita, making for a very natural feeling dimension. They are not moveable with the structure, but can be unbolted and moved separately without a ton of work.
10. Outdoor kitchen and fire pit
We custom-build both. For the kitchen, we felt that a sink, counter-space, and a charcoal grill would add to the glamping experience. The sink hooks up to a normal water faucet and drains into a 5 gallon bucket. We empty the gray water regularly for our guests. We built the fire pit out of heavy gauge steel. I love how the angles of the fire pit compliment the design of the Kasita.

11. Decor
The interior dimensions are approximately 7’x11’ (about 77 sq. ft.) With space inside being at a premium, we opted for IKEA’s functionally-designed furniture. The main bed is a daybed that pulls out into a comfy king bed, and the loft is a full bed. The ladder for the loft detaches and can be hung out of the way on the wall. There’s a small interior table that folds down too. We wanted guests to spend most of their time outside, but have a comfortable interior space for colder days.
Our favorite part about the Kasita? Laying in bed at night, hearing the lake, and seeing the stars reflect over the water. It’s magical, and we’re so happy we get to share this experience with Hipcampers.
Inspired to build your own Kasita that pays for itself when you start hosting Hipcampers? Find out more about listing your land on Hipcamp, and start earning the money you need to build your first tiny cabin!
How to start earning extra money hosting campers on your land
Want to earn extra income to help pay for property taxes, home expenses, and future dream projects? Learn more about becoming a Hipcamp Host. (Use the promo code JOURNAL and get an extra $100 when you host your first Hipcamp guest.)
Like this post? Share it!

Recent Posts
Hipcamp Awards 2024: Best Glamping Sites in the US
To help you find the best camping in the country, each year we compile data from bookings, reviews, and ratings…
Hipcamp Awards 2024: Best Glamping Sites in Canada
To help you find the best camping in the country, each year we compile data from bookings, reviews, and ratings…
Hipcamp Awards 2024: Best Glamping Sites in Australia
Awards season has arrived! To help you find the best camping in the country, each year we compile data from…
Hipcamp Awards 2024: Best Glamping Sites in the UK
To help you find the best camping in the country, each year we compile data from bookings, reviews, and ratings…
Hipcamp Awards 2024: Best Cabin Rentals in the US
To help you find the best camping in the country, each year we compile data from bookings, reviews, and ratings…
Hipcamp Awards 2024: Best Cabin Rentals in Canada
To help you find the best camping in the country, each year we compile data from bookings, reviews, and ratings…